



Creating a simulation model to practise initial steps in small-incision cataract surgery
Related content
Superior rectus bridle suture placement, conjunctival peritomy, and recession of Tenon’s fascia are important steps to practise.
When learning small incision cataract surgery, steps like scleral tunnel creation and intraocular manipulation are often prioritised. Fewer opportunities exist to practise the important initial steps of superior rectus bridle suture placement and conjunctival and Tenon’s incisions.
In this article, we show how to construct a low-cost model that can be used to practise superior rectus bridle suture placement, conjunctival peritomy, and recession of Tenon’s fascia. The model highlights the position of the Tenon’s insertion, posterior to the conjunctival insertion, and it facilitates blunt dissection in the sub-Tenon’s space at the appropriate distance from the limbus, reproducing cutting both Tenon’s and conjunctiva together, in a realistic manner.
This model has been extensively tested to ensure it functions well during simulation practice. It is therefore important to follow every step below, exactly as described.
In the next article in this series, we will show how to use the model for simulation practice.
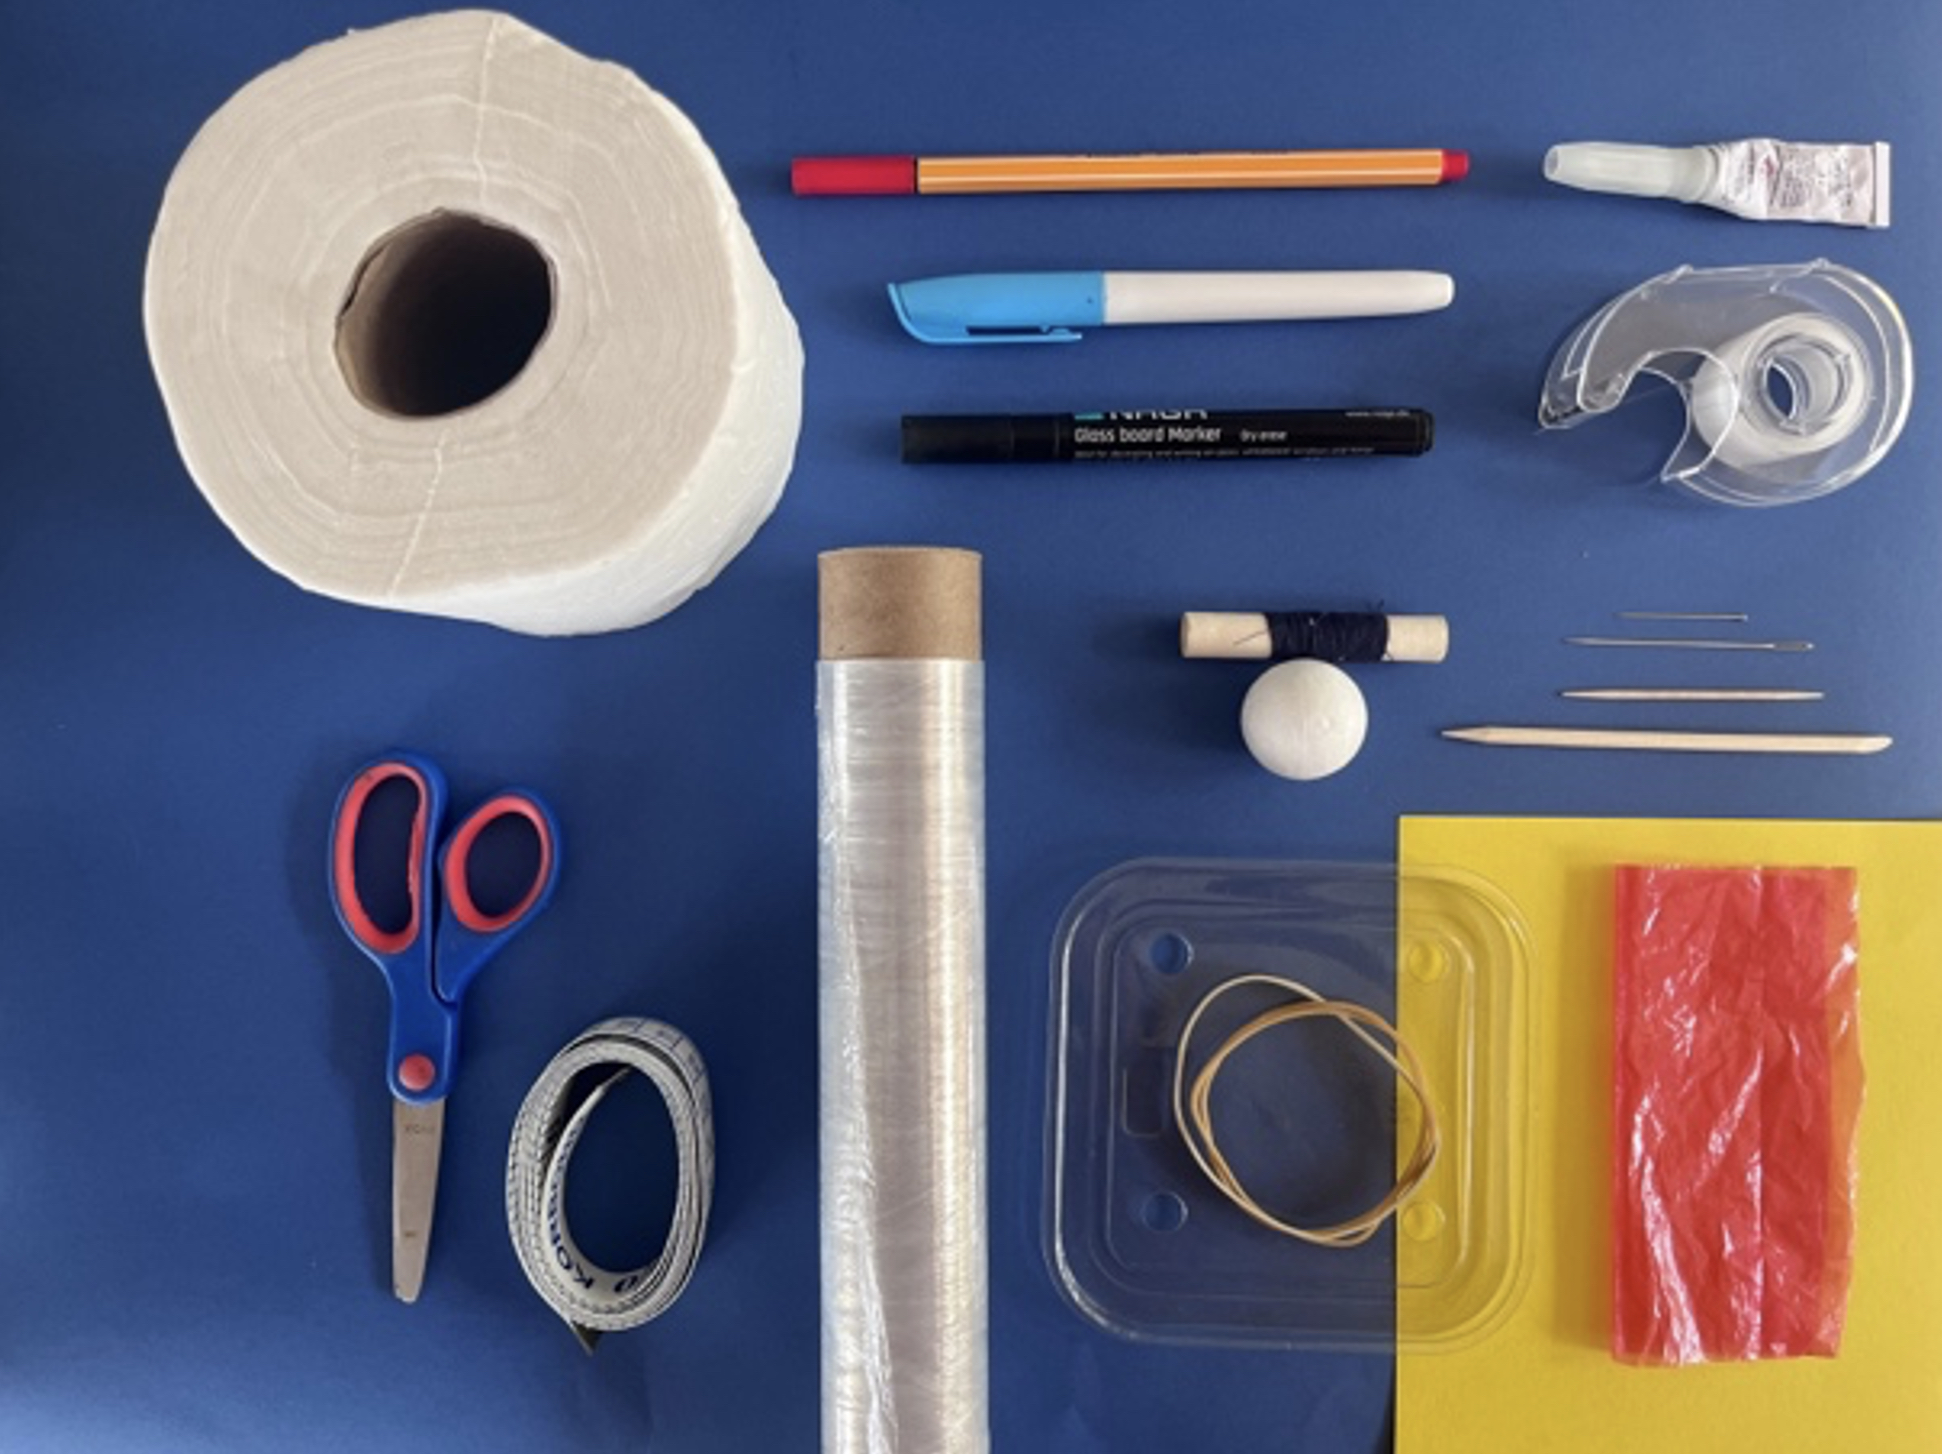
1. What you will need To create the different anatomical features of the model, you will need the following materials (see Figure 1):
• Toilet roll (to simulate the face)
• Thin cardboard, A5 or bigger (this will be made into a cone, to simulate the orbit)
• Polystyrene ball, 3 cm diameter (to simulate the eyeball)
• Rubber band, approximately 3 mm wide and at least 9 cm in length (to simulate the superior and inferior rectus muscles)
• Soft, coloured plastic (such as a shopping bag), cut into a 10 cm x 10 cm square (to simulate Tenon’s fascia)
• Cling film or cling wrap (clear), cut into a 10 cm x 10 cm square (to simulate the conjunctiva)
• Clear, firm plastic packaging material. You will need about 3 cm x 5 cm, cut into two circles (to simulate insertions of Tenon’s fascia and conjunctiva).
• Adhesive tape to simulate the conjunctival fornix.
You will also need:
• A sewing pin, just over 3 cm long, with a small, flat head
• Two thin rubber bands
• A red ballpoint pen
• Black and blue felt-tip pens
• Scissors
• All-purpose glue
• Flexible measuring tape
• A large sewing/embroidery needle (a minimum of 5 cm in length)
• A short piece of thread
• An orange stick or skewer
• A small, sharp-tipped knife, craft knife or scalpel
• A toothpick or matchstick, cut to a length of 2 cm.
2. Make the ‘eye socket’
Using the thin cardboard, cut a semicircle with a diameter of 12 cm, as shown in Figure 2a. Fashion a small cone as shown in Figure 2b. The cone opening should be slightly wider than the diameter of your toilet roll’s inner cardboard cylinder (> 4.5 cm), see Figure 2c. Secure the overlapping parts with adhesive tape. Cut about 5 mm off the tip of the cone to create a small opening.

3. Create the ‘eyeball’ shape and ‘rectus muscle’ insertion points
• Create a centre point on the polystyrene ball by marking it with the ballpoint pen. Draw a circle around this centre point by making multiple marks 9 mm from the centre, joining them as shown in Figure 3a.
• Mark the ‘rectus muscle’ insertion points 8 mm outside this circle, on opposite sides (Figure 3a). These will serve as a guide for creating the channel for the rubber band. With the sharp end of the orange stick or skewer, create a channel between the two rectus muscle insertion markings, as shown in Figure 3b and Figure 3c. The best approach is to push the skewer or stick through from one end to the middle, and then from the other end to the middle, completing the channel all the way through.
• Remove the skewer or stick.
• Carefully cut away the part of the ‘eyeball’ inside the circle using a craft knife (see Figure 3d).
4. Create the rectus muscles
• Use a loop of thread on the sewing needle to pull the wider rubber band through the channel in the ball, as shown in Figure 4a and 4b. Then remove the needle and thread, leaving just the rubber band (Figure 4c). The ends can be trimmed at a later stage.
• With the red ballpoint pen, draw some ‘blood vessels’ around the cut surface, as shown in Figure 4d.
5. Prepare ‘Tenon’s fascia’ and the ‘conjunctiva’
• To secure ‘Tenon’s fascia’ and the ‘conjunctiva’ to the eyeball, you will need two plastic discs; the bigger disc simulates the insertion of Tenon’s fascia and the smaller disc simulates the insertion of the conjunctiva.
• Draw two circles with the felt-tip marker on the hard packaging plastic. You can use a round object of the desired diameter to trace around, e.g. the cap of a marker pen or lipstick. The larger disc is 18 mm in diameter and represents the insertion of Tenon’s fascia; the smaller disc is 15 mm in diameter and represents the insertion of the conjunctiva (Figure 5a). You can colour in the smaller of the two discs to resemble an iris. Cut both out and use the sewing pin to make a hole in the centre of each disc (Figure 5b).
6. Assemble ‘Tenon’s fascia’ and the ‘conjunctiva’
• Place the ‘eyeball’ on a stable surface, with the flat surface facing up.
• Cover it with the plastic square (‘Tenon’s fascia’). Place the larger, clear plastic disc on top, ensuring that the hole is in the centre of the flat surface (see Figure 6a – the disc is outlined in the image).
• Place the cling film square (‘conjunctiva’) over the plastic disc and plastic square, covering the ‘eyeball’ (Figure 6b).
• Push the pin halfway through the hole in the smaller disc. With care, push the tip of the pin through the cling film and into the hole in the bigger disc (Figures 6c and 6d).
• Holding everything together firmly, push the pin straight through the polystyrene ball.
7. Complete the ‘eyeball’
Carefully turn the model over so the front of the ‘eye’ is resting on a firm surface (Figure 7a). A small piece of the pin should be visible on the other side of the polystyrene ball. Take care to avoid pricking yourself with the sharp end.
• Stretch the two ends of the wider rubber band around the polystyrene ball and secure them by hooking them onto the pin, one side at a time (Figure 7b). Trim any excess (Figure 7c). This simulates the inferior and superior rectus muscles.
• Take one of the thin rubber bands, and cut it once. Gather the two layers of plastic around the polystyrene ball as neatly as possible. Bring them together at the site where the pin emerged and secure them by tying one end of the thin rubber band around the plastic (Figure 7d). Do not make it too tight; there should be enough ‘give’ to allow your instruments to cut the plastic layers.
Once you are satisfied, tie a simple knot, leaving one end long enough to reach the bottom of the cone. Trim the excess plastic extending beyond the knot (Figure 7e).
8. Assemble the model
• Place the eyeball into the cone. Let the long end of the rubber band go through the hole in the cone. Tie it around the short section of toothpick or matchstick and make a simple knot. Mild tension will keep the eyeball in position in the cone (Figure 8a).
• Glue the cone to the rim of the toilet roll. There should be about 0.5 cm of the cone protruding above the rim (Figure 8b). Ensure that the inferior and superior ‘rectus muscles’ (the rubber bands) are in the correct orientation before you draw facial markings on the toilet roll (Figure 8c).
9. Create the ‘conjunctival fornix’
• Cut a segment of adhesive tape, measuring 0.5 cm x 4.0 cm. Note where the ‘inferior rectus’ rubber band emerges from the ‘eyeball’ (see arrow in Figure 9a).
• Apply the tape from the centre of the coloured disc to the outer part of the rim of the cone (Figure 9a. Note: the adhesive tape is outlined in black).
• This simulates the conjunctival fornix, which will be used to rotate the ‘eyeball’ inferiorly to create exposure of the ‘superior rectus muscle’.
• Place the second thin rubber band around the toilet roll.
• Figure 9b shows the complete model, ready for use.